Welcome Aboard!

These pages will cover the restoration and upgrades I have done to a 1979 Choate 40.
I acquired the vessel in poor condition at a reasonable price and so far have put twice that amount into her.
From the evidence I have found, she had been de-masted, run aground several times, slightly flooded, run hard and put away wet.
Fortunately, she had new standing rig with a used mast from a Catalina 40 and a recent head job on the motor.
The rest of the info I'll segregate into pages for detailed information.

Friday, December 7, 2012

Solon Table

The boat never had a solon table as far as I know. This summer I used the fold down leaf that I added to the side of the sink cabinet. It worked OK but the only place to sit was on the stairs or the corner of the port settee.


I had some old teak boards from an old gangway entry and used those to build a box clamp that goes around the mast.

To that I added a table with a fold leaf that is also supported by the main bulkhead.

It's just the right height that I can store a 5 gl. bucket or the generator beneath it.

I've added another section that attaches to the main section and is supported by it and the lower part of the mast, which can be removed for access to deck plates underneath, so I don't bag my head while doing maintenance in the bilge.


Pictures to come later---work is still in progress........................

Larger Battery Bank

I already have two group 27 high amp Batteries, but with the new refer I knew I would need more. And eventually I'll be adding solar panels so I'll need a place to store the extra power. With just the gp 27's I could go two days without recharging but with the new refer that would probably bring it down to one day.
   I had this large empty space behind the motor and since it is ventilated while the motor is running/charging it made the perfect place for the new batteries. As well, the gr 27 batteries are vented into the engine space.

The base for holding the battery box...........

Aft mountings for holding the base. Attached to the strut thru bolts.

I made a pair of 3/4" studs that screwed onto the 3/8" thru bolts, and added washers/nuts to hold it down.

Also added a front and side tabs to help support the base.


Reinforced the corners with wood and epoxy filler, then glassed over with a couple layers and faired in for the paint work.


Added a couple straps with release levers to hold the battery box in place.

 And since the battery box was 6' away from the selector switch, I went with all new 2/0 maine battery cables.

I also added a 2000 watt inverter, which required using 1/0 cable, but I went to the 2/0 through out the system except the starter cable. Which I left as a #2 cable.


I couldn't find a terminal crimper locally that was large enough so I just modified a hydraulic one that I had to do the job.


Finish product.................................. Then added heat shrink insulation.

I went with two 6V deep cell batteries in series for the house side of the switch, only because they were so heavy I couldn't get a large 12V into the space w/o special help.  I prefer being independent, not relying on other people to help.


These are the gp 27's with all new cables with breaker switches.

Also added a Yandina 160 combiner to charge both banks while running. In the back is the breaker for the house (2-6V) batteries.
  The starter cable is hooked to the common of the selector switch, which goes threw either the 27's breaker #1 or house breaker #2, or both.

I also have a gp 27 battery up forward for the windlass and wash-down pump, which is attached to the common of the selector switch. It is controlled by a Yandina 50 combiner at the battery. See the windlass page.

Adding a Refrigerator

This summers cruise got me to thinking I need more cooler space that is EZ to access. The Ice box is fine for drinks and stuff that can get wet but there was never enough space for jars and square containers for supplies and leftovers.
I already have a portable 12V cooler that I use for frozen foods.

I have a fairly large space that I can squeeze in a refer so I had to choose a refer that would fit. I came up with a Norcold. DE0788B with 3.1 cu. ft. 12VDC/120VAC combo.
  I could have gone bigger but the outside dims would only allow this one to get over the stove.

Also I have this small compartment that has been useful for storing breads. The portable is attached to a larger compartment cover that is hinged. So I had to cut an angle in the lid so it could still be raised with the new refer in place.


The base for the new refer...................

Had to install a 120VAC outlet for the new refer.

I painted the small compartment white for better visibility in the darkness.

Here with the base above the small compartment.

Here with the refer installed.


Thursday, November 1, 2012

Head/Shower & Hanging Closet

This turned out to be a real challenge! To start with there was only 5'8" of head room with the present decking. So to add a drain and keep as much head room as possible I went with a preformed shower base with an electronic drain/pump assembly.

This is the hanging locker side...................


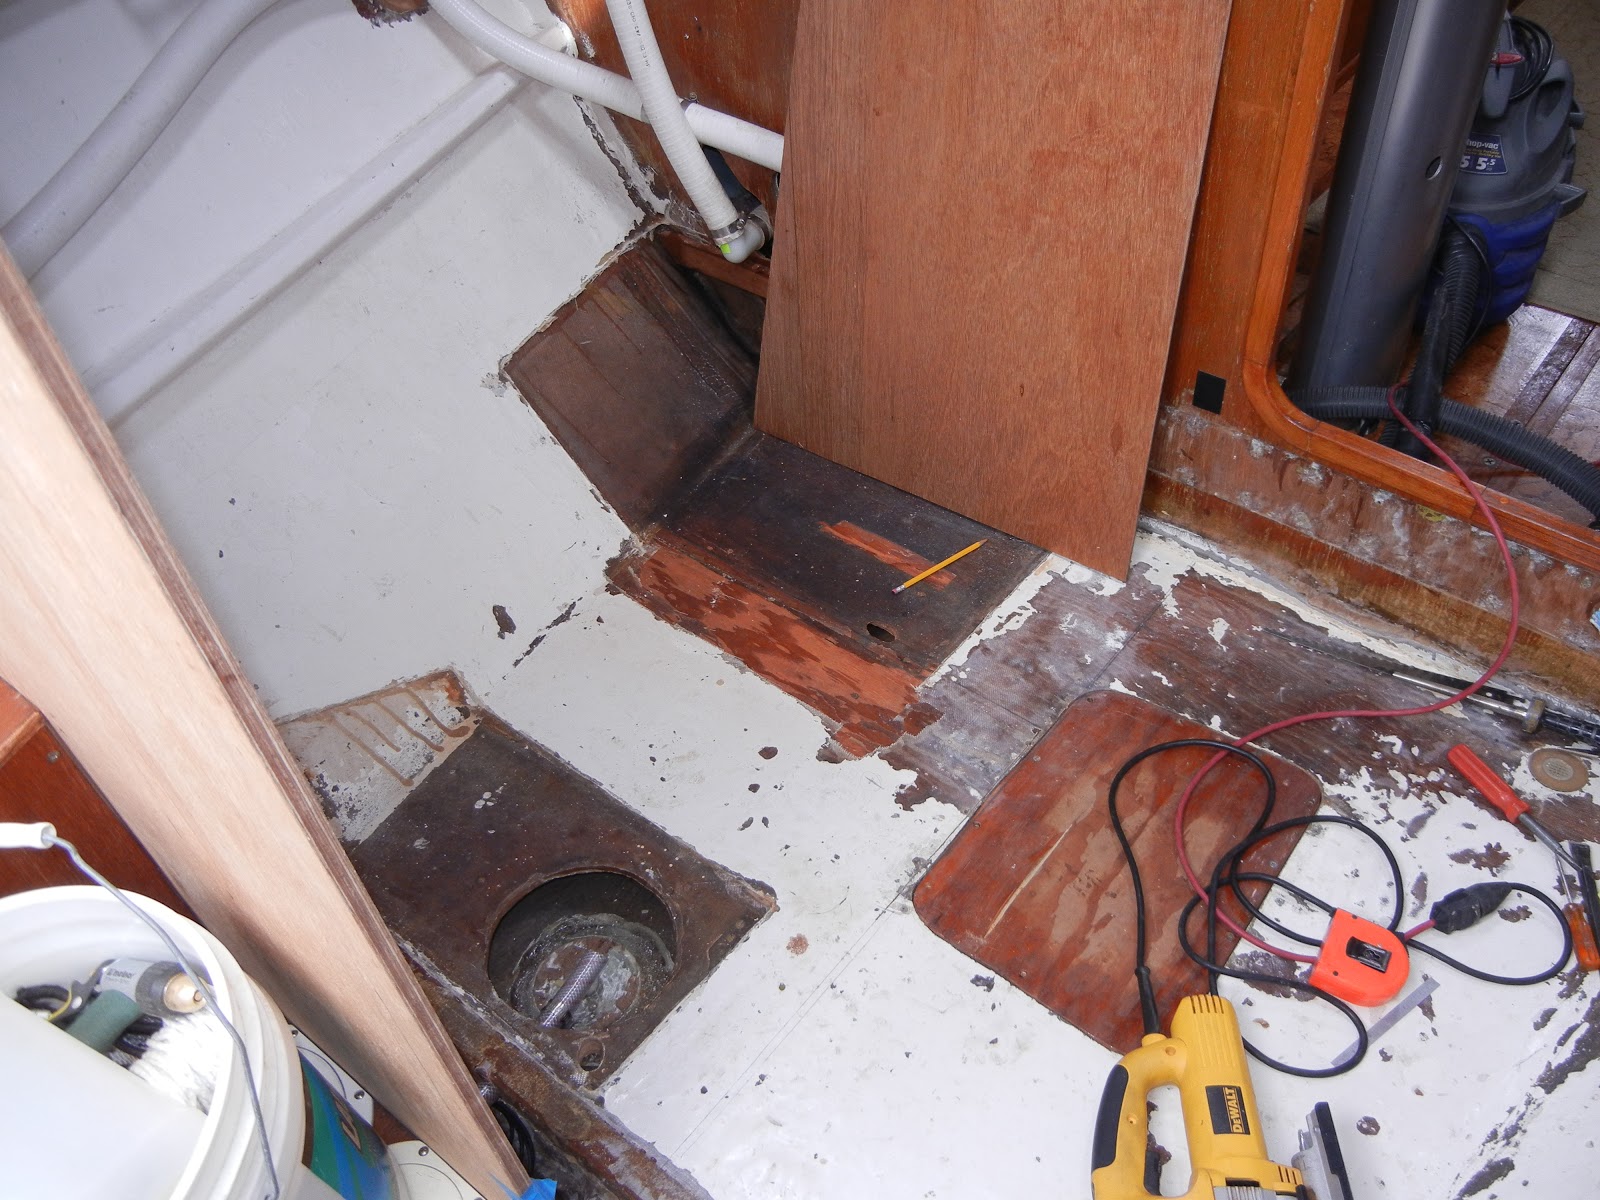
The hull was only 4"below the old decking and the old thruhull was sealed off. The hoses on the right goto the overboard discharge valve under the settee next to where the old holding tank was.

 I purchased a preformed shower base and cut and ground many times to get it to fit in real nice and level


 The ancient knot meter wasn't working and had been cut off years ago. So it was pulled and a plug put in. Some day I may reuse the old thru hole, if I can find a transducer that will fit. In the mean time I place in a board and deck fitting to access it easily.

 A pre assembly to get measurements........

 Looking forward with the head on the right. The deck and large cover has been epoxy/glassed over.

Now for an enclosure.A view fwd.

A view aft................................

 Placement of a sink and the 3-way valve

 Skipping ahead here a bit. This took a lot of engineering to figure out, what to put in and the angles involved.


 I used the left over counter top material from the galley to go under the sink.

 Adding a storage cabinet above the sink and temporary assembly.


 Another problem I had was the wire from the fish finder thru the bulkhead and around the shower base. If this were all sealed up and I tried to pull the wire through for a replacement it would have hung up under the shower base. So I epoxied in a track for the wire to guide around the base.

Now going back to the plumbing, this is where the water comes in and goes out. The yellow pump is for the electronic drains. The black pump is for fresh water to the shower and sink.

 I T'd into the down side of the overboard discharge hose for the shower and sink drains.

 The electronic drain is T'ed together at the lowest point for the shower & sink drains. The hose coming thru the bulkhead is the raw water supply for the toilet. The wood blocks are supports for the shower base.

Here I'm starting the final assembly. Glued down the shower base and sealed up around the edges with marine sealer.

I've covered up the hoses with this removable box panel, which also supports the shower head. I put a weight and roller assembly on the hose to help in retraction of the shower hose back into the box.

Starting the white paneling work and added a shelf above the sink. Later will cut hole in for sliding doors.


A view looking forward with the hanging locker on the port (left) side

Views looking into the hanging locker looking fwd.


Cut out for sliding doors and added an extra shelf.


Added edge moldings............

Matching trim moldings at multiple angles is a bitch.


Added water tight access doors.

And here it is to date. I still need to add the sliding doors in the cabinet, lacquer the trim, add more trim and install sliding doors on the head and hanging locker. But it was functional for this summers cruise.