I pulled out the sink, cabinet and decking all the way to the hull.
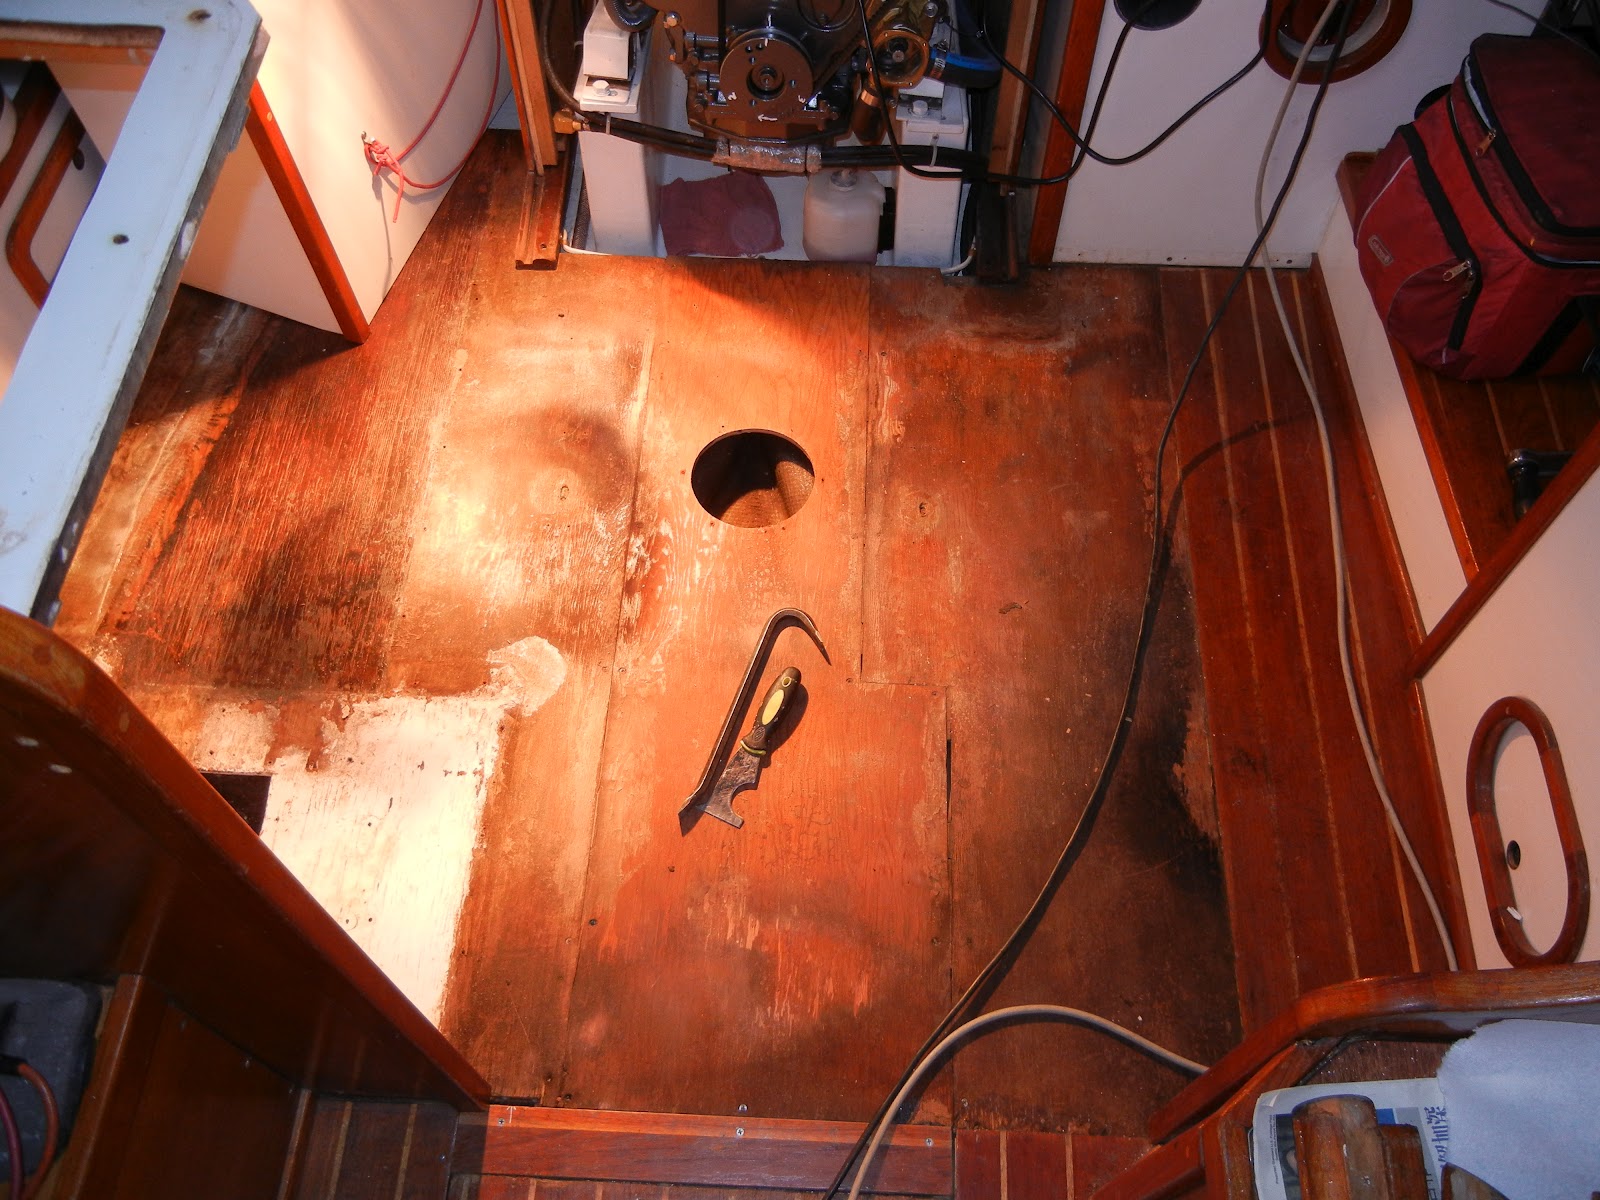


The above and below is the bilge as I pulled up the decking. The 32YO bilge was really dirty from the old motor leaking oil, and water from the stuffing box, sloshing around while sailing. I've cleaned it up with some bilge cleaner and rags. The West Marine bilge cleaner works really well.


These supports were plywood that had been tabbed to the hull. But the water has turned them to mush. So they needed rework anyway. I've cut the lower parts away and will sister in some new marine ply fully sealed in epoxy.

On the left is the new cabinet/bulkhead support sistered and tabbed to the hull. Also I ran the water line thru two new holes in the struts, which I epoxied in some FG tubing for better strength and to keep out any water getting into the core. The old holes are all full of motor oil and I doubt I could get anything to stick w/o redoing the whole mess.

Here on the stbd side I've started the new flooring, which I've added a coat of epoxy on the under side to keep out the moisture.

And the port side here. I've added in some extra wood for better support. The old floor was constantly creaking where ever one walked. The screws were all loose where they were in the FG. So now the screws have something to bite. And a lot of the old wood was half rotten or too soft to even hold a screw.

Here is with the center piece in place. It's nice a solid. I can walk on it now w/o a sound of movement.

Added tabbing to the seams...................

Put in new panels over the keel and bilge area........


I decided to put in a sink to more my liking. I hated the old double sink! If you wanted to rinse off the plates or pans, I could not get the whole thing under the pump faucet. And since I already had this sink from a previous boat (30 years ago) I went with a solid surface counter top for around the sink. BTW this sink at todays prices was $493, online. Worth keeping for 30 years, I guess.

Put back in the old plumbing while adding a salt water pump (on the left). So here is 2 foot pumps, 2 pressure pumps, valves for 2 water tanks, a water filter for the fresh water and a switch valve to switch between the saltwater inlet and the cooler drain.

The cabinet with new laminate...........

The partly finished unite. I also cut a larger hole to access the under side of the sink. I'll be installing a teak lined door to cover the hole on this one.

A view of the sink assembly. I also added a soap dispenser. So, the left side is the salt water system and the right is the fresh water system. With this set up I can conserve fresh water and have a place where I could even clean a fish. The sink is 12" X 26" inside dim's.
I'll seal the seam between the two counter tops with 3M-4200.

Here's with the corner piece installed and the teak refinished and screwed in place.

I added fasteners to the panels to secure them and for EZ removal to the bilge.

I decided to go with cork flooring and since the edges are fragile I've lined the edges with teak strips to keep them from breaking down.

The cork flooring loosely fit in the galley.

The cork flooring in the solon passage way.

A view looking aft of the entry way, still loosely fitted. Notice the cutouts in the ladder. Coming down was dangerous. One only had about 2" to get ones heel to grab on each step. The wife slipped off once and I twice. So now, with the cutouts one can get more then half their foot on the step while coming down. Also I'll be adding a FG nonskid to the outer edge. The same stuff used in grating panels. The stick-on stuff only lasts a couple days while aboard.

The galley again. The two strips on each side of the ladder is for the engine room enclosure panels to slide out far enough for me to pick them up w/o damaging the cork. Each side panel weighs about 30 lb.

I still need to cut a few small pieces and then glue it all down. I chose an indoor/outdoor carpet adhesive since I need to be able to slide the tiles in under and around some tight areas. With contact cement I wouldn't be able to do that. The down fall is the complete cure time is 3 days. I can still walk on it but do have to be careful. IAW no workie inside. Update: The carpet cement became tacky within a 10 minutes and I was able to walk on it with in 20 minutes.
To hold the panels down I made up these sunken "V" inserts.

On the under side there are some 5/16" SS "T" nuts. The Phillips slot is so big one can use a Phillips or a flat screw driver to unscrew them.

Have been planing to buy a new stove so here it is already mounted in. A Force 10 model # 63551.

After the install I checked out all the goodies and found that the electronic igniter doesn't work. I changed the battery and still no good. I emailed the manufacturer and they still haven't replied in two weeks, so I guess i'm going to call them direct.

And since it's propane I built an air tight propane locker just aft of the galley (the pantry) snugged up to the overhead next to the transom bulkhead. It took two weeks to build this thing with all the angles, and seams to seal up. Plus the dump tube/hole runs thru a hose all the way to the opposite side of the boat due to it being so close to the water line. If heeled over water could come in the overboard thruhull fitting.
You can see it's placement behind the box freezer in the next few pictures.


So, I decided to put in a subfloor and finish it off just like the galley.


Back to the propane locker; I cut a hole in the deck above the locker so one can shut off the valve from the top, just like is says in the ABYC standards, except that it doesn't open from the top. But with the large drain hose and and the top uncovered it should drain if there were any leaks. I dumped some gas in the locker by opening the valve with the hose off and the smell dissipated fairly quick.

There is enough space that I can put some 1# bottles if I like. But I don't think the USCG would approve.


Here's the exit drain for the locker. The problem being trying to get it below the bottom of the locker. It was so close to the waterline I added a flapper to keep water form splashing into the hose and possibly getting into the locker. I do plan to make a new one using SS on the next haul out.

Here's the exit hole on the bottom of the locker.


