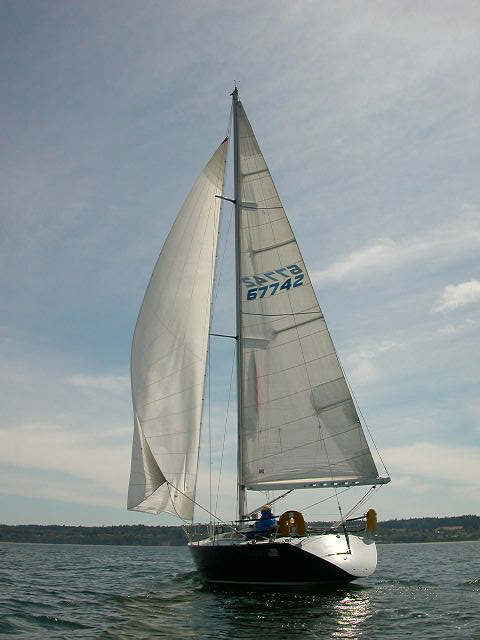
To date there are only seven winches now mounted. It came with four halfmoon blocks for the mast halyards. But ended up buying two more, which Schaefer was very helpful since they had been discontinued in that size and made me two on a special order. Most of the deck gear was Schaefer.

It seemed like practically every bit of deck gear had lost its seal and was leaking into the inside of the boat or into the core. The boat was a real mess as far as maintenance was concerned. It came with two jib tracks on each side in which every fastener was leaking through and/or into the balsa core. The head liner was stained and ugly so I just ripped it all out.

After all the repairs were done and all the holes sealed with epoxy/filler two new tracks were installed in place of the one closest to the cabin windows. I also had to back fill the inside. Apparently, The PO's had been tightening the T-track fasteners and crushing the deck on both sides. The inside backing plate was a long aluminum strip 1/4" x 1" wide that had really bad erosion/scaling and looked like a roller-coaster. The new backing plates are individual 304 SS 1/8" x 2" square.


The foot blocks were in sad shape also. They had been leaking into the inside/core and the aluminum backing plates were ugly. As well the teak under them was cracked. So another core sealing and repair with new temporary backing plates along with epoxy coating the teak and sanding it into solid pieces.


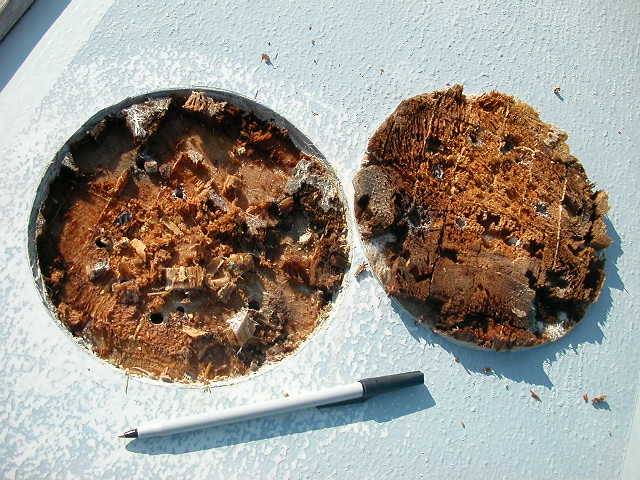
One of the first things I did was to attempt to seal up a couple deck ports on the aft part of the cockpit which were 3". Since that area, slant transom, didn't have any ventilation I installed 4" deck ports with scoops. This would help suck some of the motor fumes aft wards and away. And I was able to seal up the core with larger holes. The old core had rotted in the 3" area. Eventually, I ended up pulling them and adding a spacer underneath to make them flat. It was hard to get the covers on/off and they were cracking around the screw holes so I had to replace the lower sections as well.

The next project was pulling the toerail/T-track. I could see where there were several spots along the hull/deck joint that had been leaking. I pulled off the 5' aft section, which was a lot of work The fasteners were either rusty, bent or damaged from the excess being cut off on the inside. I bought all new fasteners. I tried to find new toerail the same and Rigrite said they had it but their customer service was so bad it was unbelievable. I tried other places w/o success. It was getting close to sailing season so I just sealed up the old 5' sections and reinstalled them with goal of trying again another time, which ened up being 8 years later. A discussion for another page (Sealing hull to deck joint).
---------------------------------------------------------------------------------------------------------------------------------
Along with track fastener problems there were winch bases, padeyes and other deck gear that had been leaking and rotting the core in spots. Fortunately, balsa coring has little square blocks and when laying fiberglass out over the core, resin flows down between most of the blocks sealing them most of the way around. If water gets in they usually stop the progress of the water and most of the damage is localized tto the initial leak.


As well there were other areas of the deck that needed attention. It seemed the manufacturer used a lot of fairing material on this boat. From evidence the hull looks to have been made in two halves over frames and put together and cored with foam then heavily glassed over on the inside. The deck looked as though it was built over a frame cored with balsa except around the windows, which was foam again. And the cockpit sides are 3/4" plywood core with the deck balsa cored, all glassed in on both sides.


The deck forward of the toerails along the hull/deck joint was also faired in with a filler which looked like car bondo. It seemed pretty stupid but it did last for 20+ years. So, in a lot of the spots I dug out the loose stuff, filled it in with epoxy/filler and glass/epoxied over to prevent anymore cracking.


A couple years ago I made up some plates, had them polished and mounted them with screws and a lot more flexible sealer.

At the time of purchase the chain plates just came thru the deck with just enough sealer to keep the water at bay. From what I could tell it appeared that the chainplates had been replaced and reinforcements added down the inside of the cabin bulkheads and on into the bilge stringers.


Later on I added some cover plates around the chainplates, bolting thru to the underside chainplate, and sealing it all off with lots of 3M 4200 UV. Added the vinyl covers too to keep the genoa sheets from fraying on the turnbuckles. The T-track/toe rail is off here for hull to deck joint work that I'll explain later on.

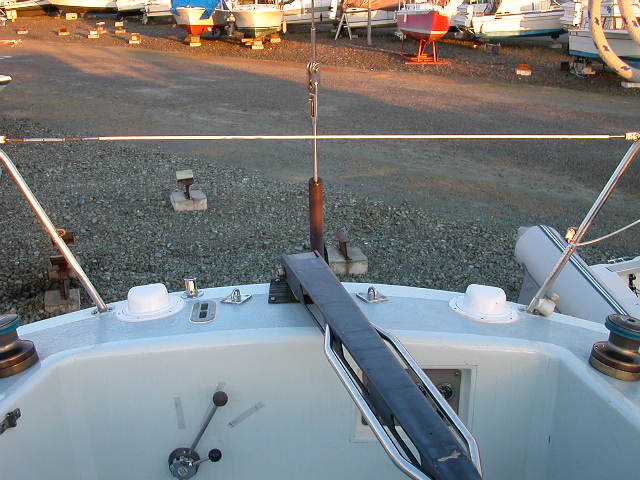
At the time of purchase the halyards and halfmoon blocks were mounted right to the deck right on top of the nonskid, which is actually sand embedded right into the gelcoat. A few of the fasteners were leaking.

I wanted to run all the lines back to the cockpit for single handing so I pulled all the winches and halfmoon blocks. There were only 5 blocks and I needed one more to get a spinnaker line in. I called Schaefer since they didn't show any on their site. They didn't make this style in this size any more but said they would make one more for me. Very nice of them!

The holes that were drilled for the blocks were done w/o epoxy back fills and were to be move anyway, so they were all filled with epoxy filler and smoothed off along with the nonskid.


To add to the strength I made a pair of SS plates to sandwich the deck and re-drilled new holes using the upper plate as a template with the blocks placed in their new position for running aft thru organizers and clutches. These holes were also back filled and re-drilled to seal off the core.


To keep the lines clean and from wearing on the deck I made raised pads for the organizers and clutches then epoxy/glassed them in with radius corners.

Then placed two of the self tailing winches in the center pull of each clutch. In the mean time the repairs further up this page were done around the entry and winch bases.

One of these winches had a worn out pawl gear. I emailed Arco-Hutton in Australia and they sold me a new one for a Barient 23ST.

Also while doing the lines organizers I recored and replaced only the inner genoa track with new.


Everything got new SS backing plates, winches, clutches and all.