
There was a little rust but not too bad compaired to a lot of boat motors I've seen.


The mounts looked bad but were still soft and the motor was still aligned.

The muffler/wetlift, if you could call it that, was a mess. It created back pressure and was rusted out/leaking. As well as barely above the waterline. I guess racers don't care much.

Since it was winter and had lots of time, the first things I did was install a proper wetlift.

Also added a "T" system for the raw water inlet so I could run the motor while on the hard, as well as flush the motor with fresh water and/or winterize.

The exhaust well above the waterline

Exhaust exiting out the side of the hull. Originally, it went out the opposite side thru a seacock (that was frozen). Which I turned into a outlet for the manual whale pump, up in the back of cockpit, which I also had to rebuild.

Also put in a vented loop for the new exhaust cooling header.

The alternator still worked, but I did sand blast the aluminum parts and paint it, and put in new bearings and brushes.

I pulled the tranny and put in a new seal kit since it was leaking. Also replaced the rear bearing that was pitted. And cleaned up the bellhousing & painted. Adjust the tach pick-up too.

The tranny was nasty from the old wetlift dripping on the thing.

The alternator clean and painted..................

The old raw water pump I could not buy parts for any more and it was a bitch to change the impeller, so I bought a slightly larger pump and retrofitted it in with the access forward so I could get to it w/o removing the pump, which required another sheave and belt.


Also installed a recovery system for the coolant (not shown here).

Later on I installed new motor mounts and an adjustment plate that will be explained later.

I also upgraded to a PSS and flex coupler, which dried out the bilge and reduced the vibration a bit.

After 4 seasons and about 500 hours of use, I was up in the Desolation Sound, BC, when I could hear the idler pulley starting to squeal. The dog had heard it first the day before, remembering his attitude while in the cockpit, that day while motoring out of the channels.

And since there were no VW dealers anywhere close I decided to try and just sail back to Everett as much as I could. And of course the wind was not cooperating so it took a lot of patients and still some motoring. I had to use the motor a couple times to get in/out of some ports for the night and round the South end of Whidbey Island going against the tide. But when I got to Everett the squealing had stopped.
I was going to replace the pulley but I only had 1/2 hour left to motor to get back to Dagmar's Marina up the river. So I figured it would make it. Wrong!

As I was wanting for the bridge to open I could smell rubber burning. Next thing I knew the motor had stopped and I was drifting into the wrong side of the bridge opening. So had to drop anchor and get towed in the last 1/4 mile.

Well, it broke the cam and bent all but 2 valves so that was it for this motor.

I did rebuild the head, replace bad parts and sell the motor/tranny later the next year after installing the new Yanmar.

I was going to buy a new motor anyway but not under theses circumstances. It turned out a good thing anyway due to the complications with the upgrade, explained later.

First I made new mount plates for the motor beds just like I did for the old motor. Using the plates I could fine tune the adjustment of the motor mounts to get the alignment quick and easy.


Then I had to rebuild the beds because the new motor mounts were farther back in relation to the trany coupling. Fortunately, they were the right width, but a little on the wide side about 1/2" overall. Still on center though.

I ground and fill a piece of mahogany to fill the gap that was clearance for a motor mount bracket.


Added extensions to the aft section for the mounting plates.


Filled the old holes with mahogany dowels and epoxy/glassed over down to the hull.

While pulling out one of the old SS lag bolts it broke off. fortunately, with part of the stud above the wood, enabling me to get visegrips on it after removing the mounting plate.

After glassing it was faired in and painted.


I built an angled pallet to match the beds for pulling the old motor out. And used it again to put the new motor in. The motors were small enough to get in/out of the gangway hatch straight above the pallet. The guys at Dagmar's did the lift while I steadied it going in/out.

I had block & tackle on both ends so as not to go too far on the angled bed.

Then came the alignment of everything. What a pain that turned out to be.

I had to buy a narrow Vetus wetlift due to not enough space to get a round one in with 4" ports, required by Yanmar.

As well, the wetlift had to be installed off center due to the shifter being directly below, not leaving enough room to install shifter cables. Note pictures later on.

In order to install a vented loop I had to find some special automotive right angled hoses to get a system to work.

The out and in fittings were so close you couldn't get two hoses together in at the same time.

Even Yanmar had to make a special hose to adapt.


Then came fastening the mount plates with galvanized lag bolts (not SS) to the beds.

After aligning the shaft come a little more paint.


Everything on the Yanmar was opposite from the Pathfinder. So I had to move the seacock to the other side and glass up the old hole.

Moved the strainer.........................


Had to find parts and install the dog-leg for the exhaust.


Installed a flex coupler since it worked so well on the last motor.

Put dimples in the shaft for the coupler set screws and polished off any burrs.


A mount for the wetlift to keep it level and for something to hold on to. Epoxied and screwed in place.

The old fuel line was too small, and old, so I had to cut out a section of the under floor to replace with new 5/16" (8 mm) line.

The teak/holly decking will be replaced some day.

Coolant return tank........................ Which ended up underneath.

Added a raw water line and small strainer to the T/flush riser, for salt water to the galley sink.

Cables to the trany.............................

A wet line to the PSS......................

The exhaust goes into the transom, up to a "U" elbow just under the main deck, back down to a 4" "Y" that splits into smaller outlets (the old motor size) and then to the hull outlets for a Northsea Traverse Exhaust system, except better. The back wash would almost have to reach the deck (4' away) to get to the "U" By then it would be on it's way back out the other side. The "U" is a foot higher then the "Y"

The port side was a bilge discharge fitting.

The starboard side was the old exhaust.

Now it has an exhaust outlet on both sides and a 2" cockpit drains on both sides.

The bilge drain runs thru a riser and out the bottom of the transom at the lower corner.
.....................................................................................................................................................................I ran it on the hard and everything seemed to work fine. Although, the motor did vibrate a lot more then the old one. Now for the sea trial.
We launched on a high tide and the motor ran good tied to the slip. We backed out and shifted into forward, everything was fine until I accelerated up to 2000 RPM's. I could hear the shaft hitting the stern tube but only in forward, reverse was no problem. I continued on down stream to an Everett slip and moored the night. I checked for motor alignment, which was of by .015". And, I noticed while motoring, the motor was dancing around a lot. So I check all mounts while making the adjustments.
The next day I took it out again w/o a slight improvement but still banging away. I went below while it was banging and noticed the shaft was whipping and even causing the PSS to sling water. I went back to the slip and put a dial indicator on the shaft and it was only out by .002", not enough to cause a whipping effect. I tied it to the slip and ran it but no vibration. So, it wasn't out of balance.
After much research, removing, swapping, changing parts and testing I assumed it was the motor movement causing the problem. So, Back on the hard and the drawing board.
Others recommended a double CV drive, so I went with the Pythondrive due to it being shorter, since it seemed I had to move the motor forward to get it installed. So back to reworking the motor beds.
Found it locally and started the work.

I had to bust out some of the work I had done.

Another problem, is the stern tube was barely larger then the shaft, by only 1/8", that's 1/16' per side.

Since I had to move the motor forward to accommodate the Pythondrive I epoxied in some forward blocks to be glassed over.

Made a thrust bracket with a 1/2 SS plate.

Lined it up and epoxied and screwed it in place.

Epoxied in gussets then faired in.

The Pythondrive requires a 4º-8º angle for lubrications purposes. So I had to plane down the beds 4º and level using this homemade longboard.

Added one more gusset in the center for strength.

Epoxy and glassed over everything.......


Then painted. In the construction I added a couple drain holes for any water up stream.

The drive uses a wedge clamp to hold the shaft in place so I had to cut off the end of the excess shaft.


Re-installing the motor..........................


The nice thing now is one doesn't have to use feeler gages anymore, just angle it in by eye. The CV's will take care of the rest.


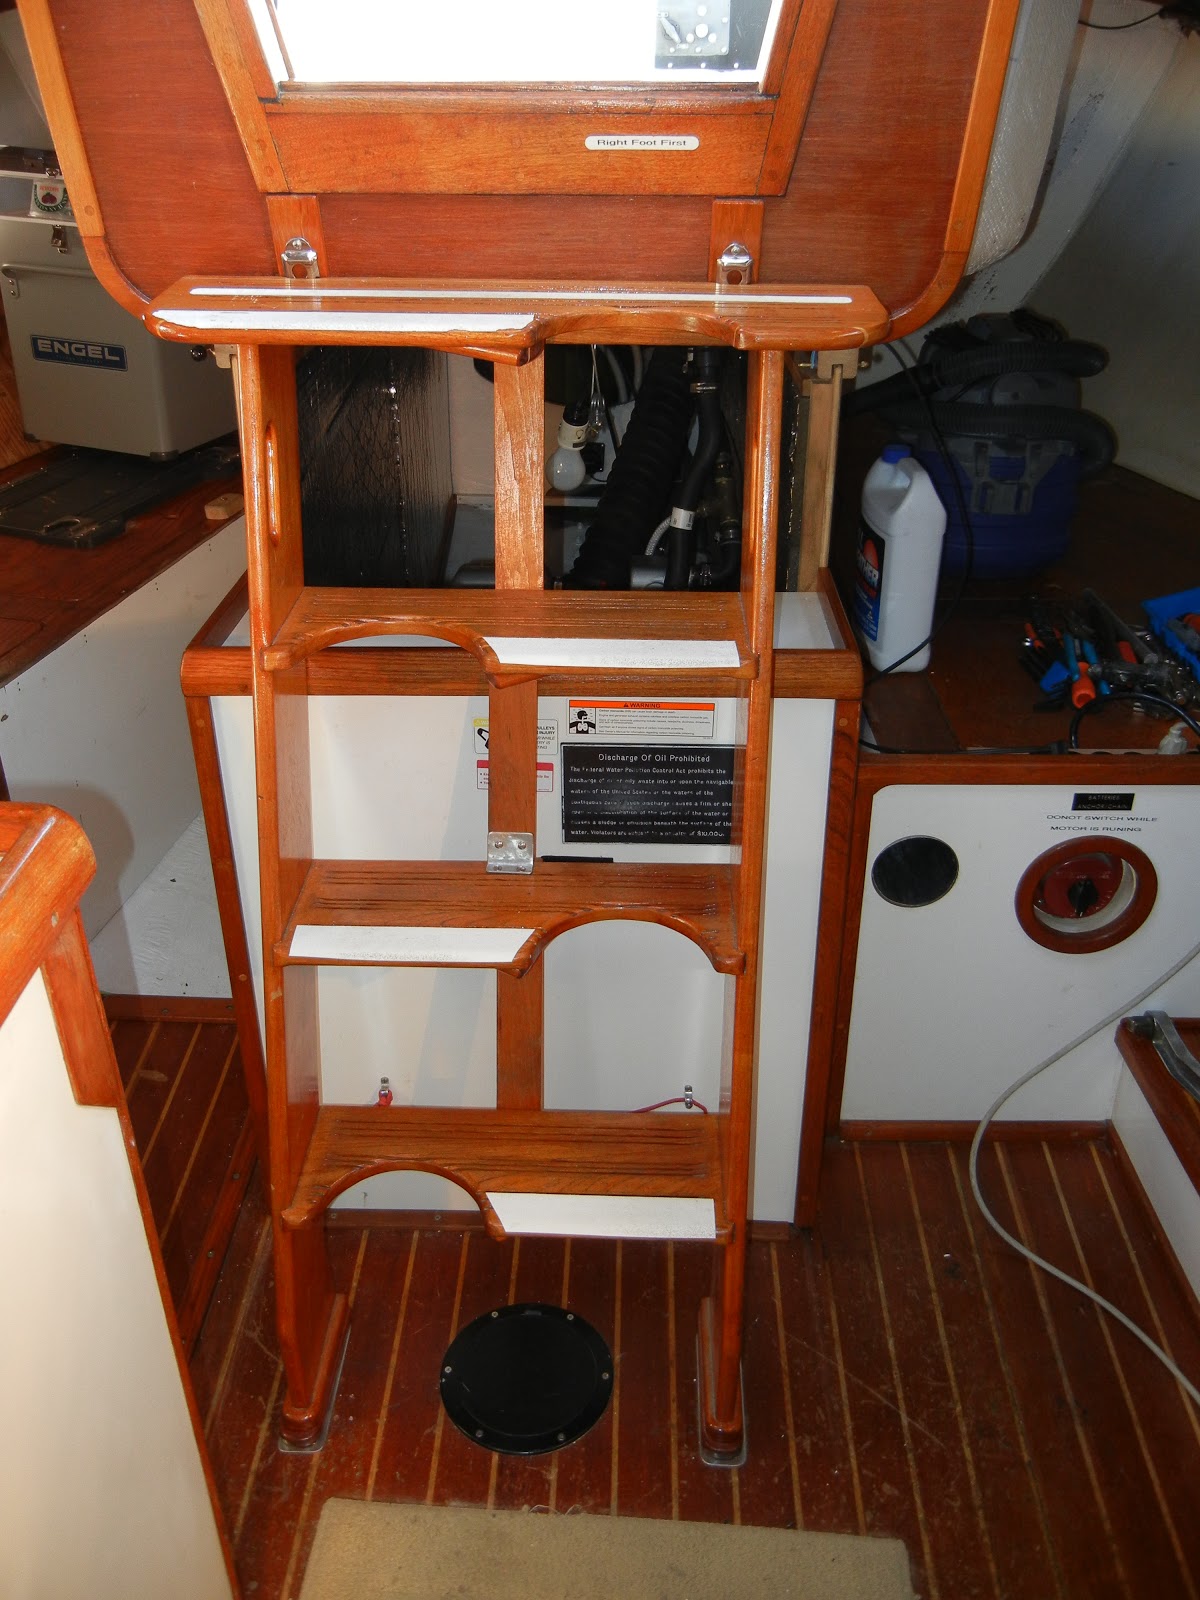
I had to enlarge /extend the motor cover and notch out the ladder to accommodate the motor being more forward.
Notice my custom ladder. I slipped off of it so many times I decided to cut out foot holes for more surface area. I just need to add a better gripping system, it's still worrisome. One just has to remember "right foot first" up & down.
We took it out for a new sea trial and the same ole crap! Apparently, the shaft is too small in diameter to handle the torque and HP of the new motor. It gets up to hull speed and starts slapping the stern tube again.
I decided to goto a larger shaft, and different prop since I'm upgrading. That calls for another posting. In the mean time I broke in the new motor while the shaft slapped away and finished off the summer with a slow cruise.
That Python Drive is a brilliant idea! Where ever did you find that? *wink*
ReplyDeleteNice work on the blog Del. I'm glad you did it. Much easier than sifting through thousands of posts on CF.
Rick & Lori