Monday, October 7, 2013

Passage to San Francisco

On Sept. 1, 2013 we got underway. I set up a crew in advance to sail the boat to SF from Everett, WA, and did it pretty good on keeping it together.  The first two days we spent inside the Sound (San Juan Islands) getting the crew familiar with the boat. 

Here we are passing under the Deception Pass bridge. The tide was against us that morning so I motored up Saratoga Pass. 


We arrived the early morning of the 3rd in Neah Bay, where I tightened up the shrouds a bit more. Then we headed over and topped off with fuel and then headed out the inlet. The first way-point was the #2 buoy off of Cape Flattery. After that I set a way point past the coastal shelf.


In the morning of the 4th (4:30 am) we had travelled 160 miles, and we were straight out from Cape Johnson (N 47ยบ 57'). It was still a bit cold even during the day.
                                 

By the morning of the 5th we had passed by the Columbia River inlet. At that point we were about 50 miles off shore The farthest during the whole passage. 
The morning of the 6th we were off of the Umpqua River.  That night is when we got hit by gusting winds a rough seas.


The morning of the 7th we pulled into Crescent City (The City of flies) for some R&R and reorganize, then to find a weather low building even more so off the coast. 
We call it the City of flies b/c the first afternoon some kelp flies showed up for a BBQ and went away at dusk. The next morning they called in the whole family before we could pull out. We must have killed 100 flies between Crescent City and SF. They wouldn't leave the boat. We must have been the fresh meat in town.

That morning of the 8th we snuck out in the fog to out run the weather low, which was building and heading north. We made a good decision. We hugged the coast until Cape Mendocino and then headed out around the point that evening. 

During the 9th we sailed on a reefed Genny thru the night to half way between Cape Mendocino and Pt. Arena then hit dead air about mid day, so motored that day and thru the night, which turned into a light fog the rest of the night. During that day I got a video of a family of white sided porpoise playing along side the boat as it motored along. 

The morning of the 10th the wind picked up. So we hoisted the sails and started the last leg for SF it was about 4 hours away by calculations. But as time passed the wind begin to build. After two hours were were in 26 kt winds and hauling ass on a close reach. When we reached the entrance buoys we turned before the wind and headed for the Gate. And just as we passed under the gate we came head to head with the Oracle which was starting its turn to head back SE. We rolled up the Genny and sailed by the main alone since it was straight down wind, then sailed under the Bay bridge and on into Alameda. And here she sits.


The boat and equipment did really well except the Garmin 6208 plotter. The thing wouldn't boot up after we left C. City. Just colored lines down the screen. The first day I started up the new Spectra 150 water maker. The boat was able to maintain power between motor runs, which was due to lack of wind, mostly in the mornings. 

In the end the boat had lost a piece of rigging for the lazy jacks, a mast mounted deck light came loose and fell overboard, the RAM mic from the VHF drowned hanging over the side in the middle of the night, wore a hole in the Bimini and blew out the flag on the MOB pole from the 45 kt winds we hit off the southern coast of Oregon.  Oh, and I lost the screw out of my glasses twice, which I didn't find the second time. Had to wire them together until I got home.


The AIS kept us out of trouble running out the Sound at night. Twice we got bumped by our CPA. The big boys don't want us heading in their direction. But I also discovered the AIS can be out of sync too. I had one boat call me and said he was going to cross my path head on. When I check my readings he's was 30 miles behind me pulling into Pt. Angeles. 

Checking back on the weather, It seems we got out of Seattle just in time. After we left a rain storm hit the Puget Sound area and flood warnings were in effect. At that time we had just pulled into Crescent City and caught the weather report history. Funny thing is we left two other boats in Neah Bay who were going to leave south the day after us. They had been waiting out the weather. I wonder what they decided to do? And I heard it was still raining with thunder and lighting. Not something I would want to be in while out in the open Pacific! 
Fortunately, it only took 10 days via Roche Harbor, Neah Bay and Crescent City. That's an average of 97 kt miles per day. A good run I would say. And the good part is we never got into any rain. The wettest part of the trip was pulling out of the fog and going past the Farallon Islands.

Well, That's it. I flew home on 9/17/13, after putting the boat in a floating storage state. IAW stow away loose gear and flush out the saltwater systems, pickle the water makers and do some minor repairs too.
Most of these pictures were taken by Mark O. one of my crew members. Thanks Mark!


The entrance to SF bay....................

Watching the AIS at night.............

After arriving in Alameda, a record of the total miles. And the max speed, probably done on the last run into SF.

And a shot of the Oracle as we pulled under the Golden gate Bridge.


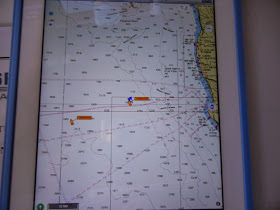
And here is a record of the passage...............


Wednesday, August 14, 2013

New Electronics

Well, the last major expense, the electronics! I wanted until the last to buy all this stuff so I would get the latest version of what's available.  I had a hard time trying to decide what brand to go with but hopefully I've done good with the Garmin stuff. I was considering the Simrad Digital Radar and accessories but the radar doesn't seem to be up to it's rep and its versatility isn't all that good. And their prices are a bit higher.

So the first thing installed is the Heading Sensor Garmin or Airmar H2183, they're both the same, just different prices. I installed it right by the alum fuel tank, which is pretty low and about on-center of the boat I can get w/o putting it in the middle of the companionway.


I built this self leveling radar mount, originally for the Simrad but had a change in sizes and mountings so it's a bit of a hack job w/o doing it over, and I don't have time, so it'll have to do. Also, I had to make a wedge to go under it due to the bad workmanship of the arch builder. So, begets the Ugly Duckling.

Here mounted atop of the arch along with the GPS antenna for the AIS (to be discussed later). The wires were a fun deal. The radar wires had to come from below and the GPS antenna wire from the top. The wires for the radar were 40' long. It's much easier to pull from below with a string.

And here with the dome mounted and wired up. I put a support strap from the pivot point, over the front and under to help stop the bouncing. I tried to make the saddle as rigid as possible with what I had but I guess it wasn't good enough. It was still like a spring.
And we now have AIS and extra VHF antenna's. 

Part of the package was a Garmin 6208 MFD/plotter to run the radar and plotter in an overlay. Also the AIS was suppose to integrate in also but there are GPS antenna conflicts I need to solve first. Seems to be a software problem.  Pictures to come later. The boat is over 600 miles away now. See new post "Passage to San Francisco".


Also added in a GMI 10, which was great for an electronic compass and keeping distance records. 


The AIS is a Vesper XB-8000. Picture to come later.  

The use of the Wifi to the iPad worked out really well. I was able to bring it up into the cockpit and check for contacts occasionally. I believe there is an alarm but haven't gone into the usage that well yet.


More to come as it progresses...............

Friday, July 19, 2013

Building a Dodger/Wave Brake

One of the times I was out in the rough, I had a wave come over the bow, which hit the canvas dodger so hard it popped a couple snaps loose.
Since I'm taking this boat off shore I decided I needed something a bit stronger. So I've built a windshield to fit up to the old dodger, with a few modifications to the canvas.
Also, up top I'm adding a MFD for the radar/AIS/plotter. This should protect it from any major hits of water/spay.

Here's how it originally looked..................


7/1/13 And here is the build process. First strip off all the canvas and snaps.

Add a foundation....................

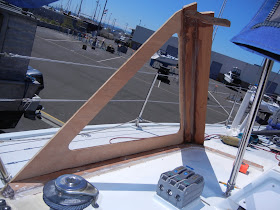
Get the right angle......................


Lay in the corners


Start in on the face..................


The windows are going to be set in just like the cabin windows were done, by the use of a register and butyl tape to hold in the windows.
This thing was a mathematical nightmare. The entry hatch and cover are off center by 1-3/4". So the window on the stbd side is slightly more narrow.


Starting the fillet work...............

To create a slight radius I added this upper board, which works great as a hand hold for leaning forward  to reach onto the now, dashboard. This is day 16 into the build.

The dodger will attach to these outer edges.......
7/23/13.....................................

The last coat of FG...........................

From a distance.............................

8/8/13... Got the outside painted today (in 20kt winds), but it's going to rain all this weekend, so other projects are on the list.

Well, I guess I under estimated the strength of 3/8" polycarbonate.  I should have went with 1/4".  I tried bending it permanently by hand. It didn't work. So took it to a sheet metal shop and put it thru the rollers and still came out straight. And I didn't want to put it in an oven and bake it for 5 hours (long story) so I had to make up these corner brackets to keep the window bent around the radius of the dodger. 


8/23/13 So with the brackets, butyl tape and poly sealer I now have windows. The canvas top is coming in a couple days.

Well, the dodger canvas is finally done thanks to inCanvas of Everett. She did a great job and even went out of her way to help me get underway on a schedule.  Thank you!


The boat has a whole new look now. Better I think! And stronger too.

The inside of the structure still needs to be finished, but it's functional and sealed. I can finish it when I have some free time after I move out of the PNW.

Saturday, June 29, 2013

Heavy Weather Bridle

I'm not looking forward to having to ride out a storm so I've given it plenty of thought. Part of the bridle gear is actually part of the inner forestay, as in the mast upgrade post.  This boat has very low freeboard and a sharp bow. So, if I were to anchor in a storm or have to put out a sea anchor, a line running over the bow would just pull the bow into the waves.

As it is, when I'm sailing, the bow seems to cut thru the waves rather then ride up over them. which really puts a lot of water up on deck and having a line pulling the bow down even more doesn't help.  My idea is to run a heavy duty bridle back about half way to the mast. This way it'll allow the bow to rise up as much as it can but still maintain a forward pull.


So, this is the main reason for putting in a Samson post, secondary to holding the inner stay deck fitting. The bridle will be pulling mostly sideways around the hull and opposite of each other, more towards a pivot point while going up over a wave.


This picture shows it too far back but you get the idea. And the wave is a bit extreme. But as the bow starts to rise the line will not be pulling the bow into the wave but will have an even pull over the forward section of the hull. This is my theory. If it doesn't work out I can still run the bridle over the forward bow chocks just like all other boats. All I can do is try it out and see.

I got these large 10"(OAL) bronze chocks from Skip'r John in Hawaii.

I've enlarged the fastener hole to take a 1/2" FH screw, and I'm going to polish them up a bit before having them chromed.  I considered cutting the ears off and adding studs on the under side but they seemed too far out of proportion.

I spent quite a bit of time polishing off the casting. But this should be good enough for chroming.

8/28/13  Got them back from the chromers today. Shiny, A!

This is where they'll go....................................

9/15/13 Got them mounted after I was in Alameda for a a few days

Side view.............................

Here it's in position with the wear plates, but I'm not happy with the install.  They were so close to the edge that the bolts couldn't go in straight.  So when I get back to the boat in Calif. I'll add a little more cap rail inboard and move them in a bit for a better bite. That will take some more epoxy and glass work. And another scupper hole for the water to drain.

Well here it is a year later and I've finally got around to redoing this.  so I've pulled the chocks and laid in some additional material, after finding a more suitable location for the new screw holes.


After cutting to shape and laying in the fillets it was epoxied in place and covered in FG with a couple layers.


Then it was sanded/faired in to a nice finish.


And taped off and painted withe a couple layers.


Drilled the holes and sealed. Now I feel better about the strength of the fasteners.


Now I just need to make a bridle. 
Also I need to go back in the yard for some premium bottom paint and another coat of yellow. The waters in Alameda are deplorable with some kind of weed that loves to grow on the bottoms. Never seen anything like it. After I'm out of the yard I'm moving up the Delta.